Step 7 - Adding control surfaces and props
Preparing
This is perhaps the hardest part of a conversion as it usually involves some complex manipulation of the model in AC3D and the construction of some new objects.
How difficult this is depends upon how the model was constructed and also where the control surfaces are placed. In the case of the decathlon adding ailerons and elevator is relatively simple but adding the rudder requires more complex manipulation in AC3D.
First of all let's take a look at which control surfaces ClearView can animate.
- Elevator - Elevator
- LAeleron - Left Aileron
- RAeleron - Right Aileron
- Ruder - Rudder
- LElevon - Left elevon, generally for flying wings or delta planes
- RElevon - Right elevon, generally for flying wings or delta planes
- Prop - Propeller
- PropDisk - prop disk, swept area of the propeller
- Elevator1 - Elevator, useful for V type tails.
- LAeleron1 - Left Aileron for biplanes with upper and lower ailerons.
- RAeleron1 - Right Aileron for biplanes with upper and lower ailerons.
- Ruder1 - Rudder for planes with two rudders.
- Prop1 - Propeller, second propeller for planes with two to four propellers.
- PropDisk1 - prop disk, swept area of the second propeller.
- Prop2 - Propeller, third propeller for planes with two to four propellers.
- PropDisk2 - prop disk, swept area of the third propeller.
- Prop3 - Propeller, fourth propeller for planes with two to four propellers.
- PropDisk3 - prop disk, swept area of the fourth propeller.
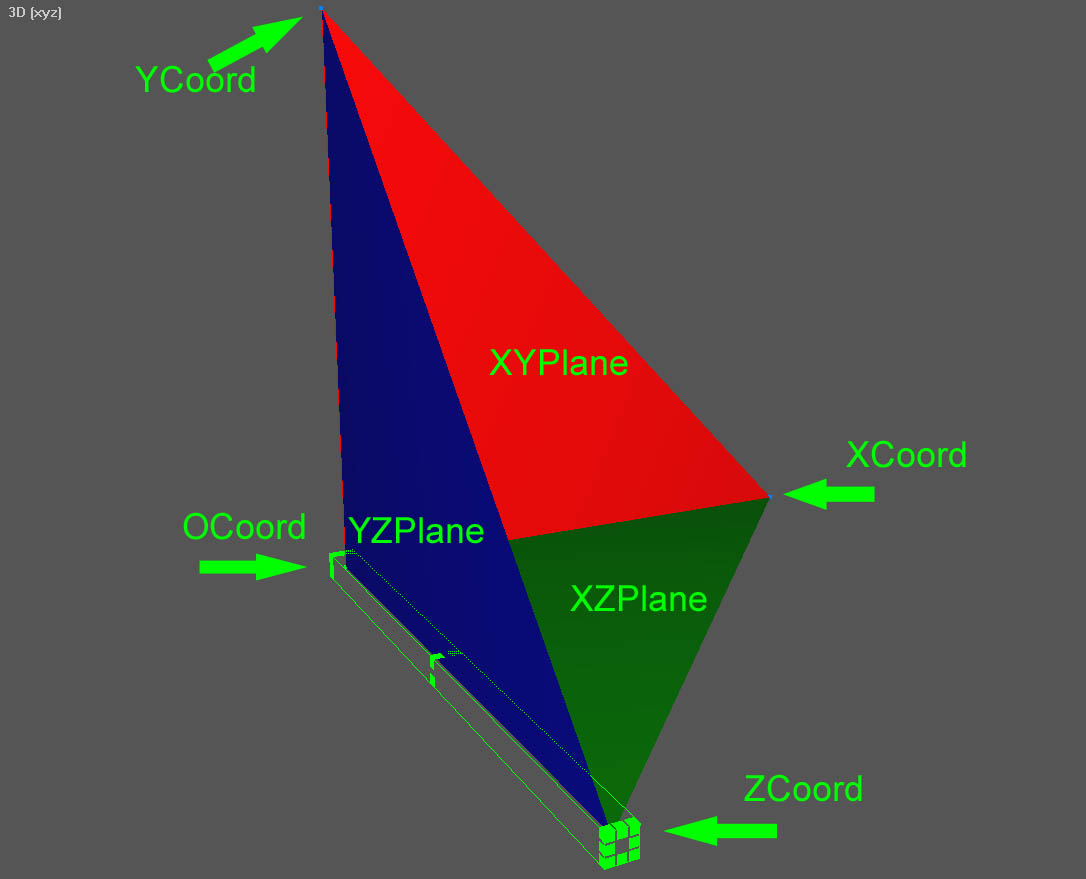
In addition to the control surface ClearView also uses a special group of objects which tell it where the hinge line (point of rotation) is and how the surface moves. This group of objects is referred to as an XYZGroup.
An XYZGroup is illustrated in the picture with the surfaces temporarily coloured for identification. The hinge line is along the vector joining the OCoord to the ZCoord, selected in the picture for clarity. The control surface then moves along the XYPlane.
So if you imagine an elevator which is hinged along the OCoord-ZCoord line, the trailing edge would be at the XCoord position. If you now pull full up elevator the trailing edge would move from the XCoord position to the YCoord position. ClearView doesn't actually move the elevator this far but it illustrates the idea.
A control surface is made up of the relevant AC3D object and this special XYZGroup in the correct orientation. A rudder also uses an XYZGroup so you can see that it will need to be rotated to ensure the hinge line and rotational plane are correct.
Now XYZGroups look quite complicated to construct and orientate so let's start by cheating and copy them from an existing model. We will copy them from the 'Edge 540 25 Percent', this model has been chosen because the XYZGroups are in their default orientation.
Firstly make a copy of the 'Edge 540 25 Percent' directory because we will be doing major surgery and you don't want to accidentally overwrite the model. (If you do accidentally overwrite something, then simply uninstall ClearView and reinstall it.)
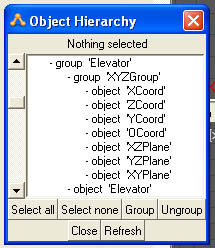
Using the copy that you have just made of the Edge 540, open the Edge540-25.ac file in the data directory. Once AC3D has loaded the model display the Object Hierarchy window (press F8). By default every object will be selected but to be sure press the select all button.
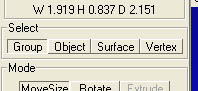
Tip: If you have been doing other things in AC3D before loading this model then you may find that nothing happens when you press select all in the object hierarchy window. If this happens then make sure you are in Group mode.
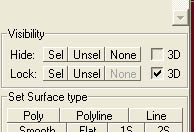
To make things simpler we will hide everything and then just reveal the objects as we want to work on them. In the Visibility panel at the lower left push the Hide: Sel button. Everything will disappear. Now to display just the item we want to start with.
Scroll down the object hierarchy until you see the entry for the Elevator group. Right click on it and select unhide from the pop-up menu. You will see the elevator and its associated XYZGroup appear in the various AC3D windows.
Now switch to object mode and select the object 'Elevator' in the object hierarchy window. It will be highlighted both in that window as well as the other AC3D windows. Now delete the object.
Tip: to delete the object the mouse must be over one of the 'orth' or 3D windows.
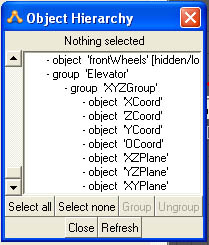
You will be left with just an XYZGroup, but it isn't quite usable just yet. Within the object hierarchy window it will now have been moved all the way to the bottom of the list.
You can see that the group Elevator now only consists of the Group 'XYZGroup'. To extract the XYZGroup we have to ungroup the Elevator. To do this, switch to group mode and select the group 'Elevator'. Then from the edit menu select ungroup. The group 'Elevator' will disappear and you will be left with the group 'XYZGroup' selected.
AC3D has a couple of limitations, you can't just save the XYZGroup as a file by itself as it also includes the rest of the model and you cannot copy and paste an AC3D object between AC3D models (if you have two or more instances of AC3D running). However, AC3D provides a more useful mechanism for achieving the same objectives. It has a library in which you can store components such as this XYZGroup for reuse in many future models.
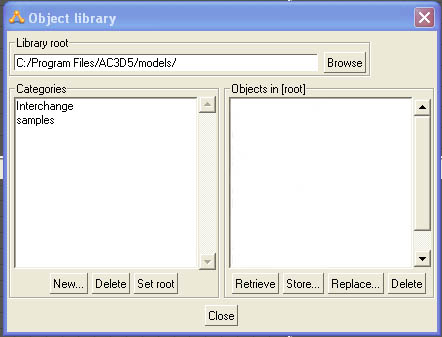
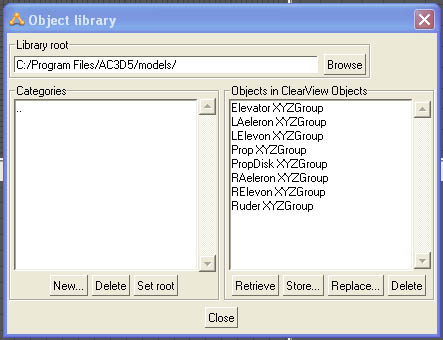
To display the library select 'Object Library' from the File menu.
It is good practice to separate out the different types or usages of objects to make them easier to find in the future. To do this now push the New button and enter a new category name of your choice, say 'ClearView Objects'. This will update the library to show a new category. Like most file windows you can double click on the new category to display the items within it. To start with the category will be empty.
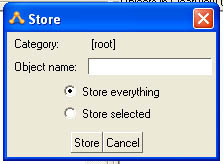
Now push the 'Store' button and a new dialog box will be displayed. Enter
the name you would like the object to be called in the library. 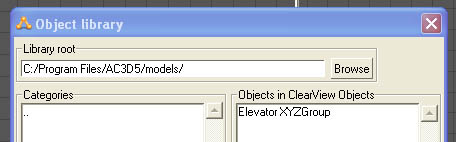 I suggest you use 'Elevator XYZGroup', ensure
that 'Store selected' is checked as we only want the XYZGroup and not the
whole model. Then click Store.
I suggest you use 'Elevator XYZGroup', ensure
that 'Store selected' is checked as we only want the XYZGroup and not the
whole model. Then click Store.
Now repeat the same action a further four times to store an object but this time use the following names:
- LAeleron XYZGroup
- RAeleron XYZGroup
- LElevon XYZGroup
- RElevon XYZGroup
Now dismiss the object library and then click Hide: Sel to
hide the XYZGroup. We now need to repeat the same exercise with the Ruder
group, the Prop group and the PropDisk group. Each time adding the final
XYZGroup to the library with the appropriate name:
- Ruder XYZGroup
- Prop XYZGroup
- PropDisk XYZGroup
To extract the Prop XYZGroup delete the 'Prop' object and to extract the PropDisk XYZGroup delete the 'disk' object.
This will then leave you with eight objects stored in your library.
You now have all the basic control groups that you will need to finish converting the Decathlon and any future models.
Tip: you can use the library to copy objects from one model to another, create another category for the purpose to avoid confusion.
Now close AC3D without saving the changes. Although you are only working on a copy of the real model (you did use the copy didn't you?) not saving changes you don't want is good practice just in case.
We are now ready to animate the control surfaces of the decathlon. The work you have just done to obtain the XYZGroups only needs to be done once. For future models you already have the XYZGroups so you can skip this stage.