Step 3 - Sorting out textures
Generally it is a good idea to check 'normals' at this point. A 'normal' is the direction a light ray would travel if it is ejected at right angles to a surface. The ray is ejected from the front surface only. You can see 'normals' by turning them on in the 'orth' and 3D windows. Select orth->normals and 3D->normals to see them. This will make the model look somewhat hairy. A tip here is to change the length of the displayed 'normals' as it make them easier to see in complex models. The length can be changed in the settings menu (file->settings) under the appearance tab. Change "Size of display normals" to 0.075 or to your liking.
A surface that doesn't display a 'normal' is set so that it has its back face towards you. Generally this is wrong and in ClearView usually makes that particular surface black or very dark. It certainly looks odd. Although this model doesn't have a problem with inverted 'normals' one has been purposely inverted in the picture below to show the effect.
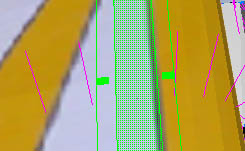
If you look along the line of pink 'normals' you can see the dot in the middle of the green area. This is an inverted 'normal' with the rest being correct. This would give rise to bad shading in ClearView.
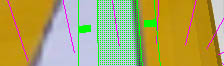
To fix a bad 'normal' select the surface (use surface mode) as in the illustration then chose surface->flip normal to make it correct.
Sometimes it can be difficult to see wrong 'normals' because the top and bottom surface of a wing can both be inverted. This means from the top you are actually seeing the 'normal' for the lower surface and vice-versa. A tip here is either to make the surface one sided so you can see missing surfaces or just flip the 'normal' for a surface and see if it gets longer. If it does get longer than that is the correct way round.
If you were to try looking at your conversion in ClearView at this point you would notice two things. The colours are strange and any writing is mirrored. The first is caused by the way ClearView loads bitmaps and the second by the different way in which FMS and ClearView use coordinates.
The first step to fix the colours is to convert the bitmap file to a jpeg file. This can be done with almost any image editor. In paint it is simply a matter of opening the file and then saving it as a .jpg file. Usually you will keep the same filename. Note however the file formats are different between a .bmp and a .jpg so it is not enough to just change the name.
In this case open the w-decathlon.bmp file in Paint and then save it as type JPEG (w decathlon.jpg).
Now applying the change of texture file can be tricky as surfaces are often coloured using an attribute rather than a texture file. Applying a texture file inappropriately loses the colour and applies a texture that you don't want. So where possible, until you get skilled at textures and meshes, try not to change too much.
The first part of amending the textures is to generally change the texture from the old .BMP file to the new .JPG file. You cannot do this on a wholesale basis as you will assign textures to surface that shouldn't have one. The change has to be made on an object by object basis.
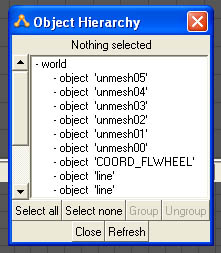
The simplest way to do this is using the object hierarchy display. This can be brought up either by pressing F8 or from Tools->Hierarchy View.
You should also be in object mode within AC3D to enable whole objects to be selected.
Each object in the object hierarchy view is an independent part of the plane. Because of the different ways in which models are created and in which ClearView converts them there may be no apparent reason why some elements are individual objects. However, changing that is an advanced topic.
For now push the 'Select none' button in the hierarchy window to ensure nothing is selected then click on the first object, in this case 'unmesh05'. This will select, and highlight, that single object (in this case the two wing tips).
Unfortunately AC3D does not easily provide texture file information so we have to approach this from another angle. To find if the object has an associated texture and which texture file it is, it is necessary to bring up the texture editor by pressing F10 or Tools->Texture Coordinate Editor.
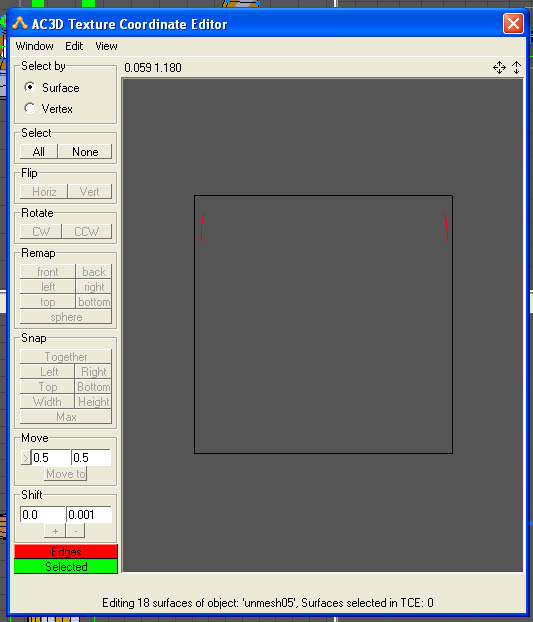
In this case the texture editor shows no background image and this means that this object does not have an associated texture file. We do not want to assign a file either. Close the texture editor.
Back in the Object Hierarchy view deselect object 'unmesh05' and select the next object 'unmesh04'. Again display the texture coordinate editor.
This time you can see that a background image is displayed. This is a texture file. Object 'unmesh04' has an associated texture. Incidentally, in models where there is more than one texture file you can see which one is being used as the filename is displayed at the bottom of the Texture Coordinate Editor window. In this case you will be able to see that it is w-decathlon.bmp.
It is now necessary to change this from the .bmp to the .jpg file.
To change the texture file, exit from the Texture Coordinate Editor. Then select the menu item Object->Texture->Load Texture. Navigate to the w-decathlon/data directory and select the w-decathlon.jpg file. This has now substituted the .jpg file for the .bmp file for this particular object.
If you now take another look at the Texture Coordinate Editor you will see that the texture is now being read from the .jpg file. No changes are needed to the coordinates because both files, being copies, are based on exactly the same coordinates.
Now repeat this process for the remaining objects. For subsequent objects that need to have the texture file changed it can be selected directly from the Object->Texture sub-menu rather than having to navigate to it through the Load Texture menu item.

In this model's case no other objects have a texture.
Now we need to change the lettering to be the correct way round.
The author of this model has been very helpful in that the writing has been separated into their own surfaces making changing them around very easy.
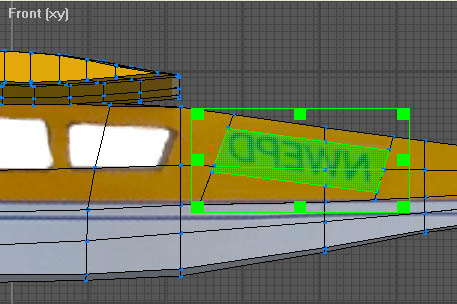
Change to surface mode and in the front window select the four surfaces that make up the plane registration letters.
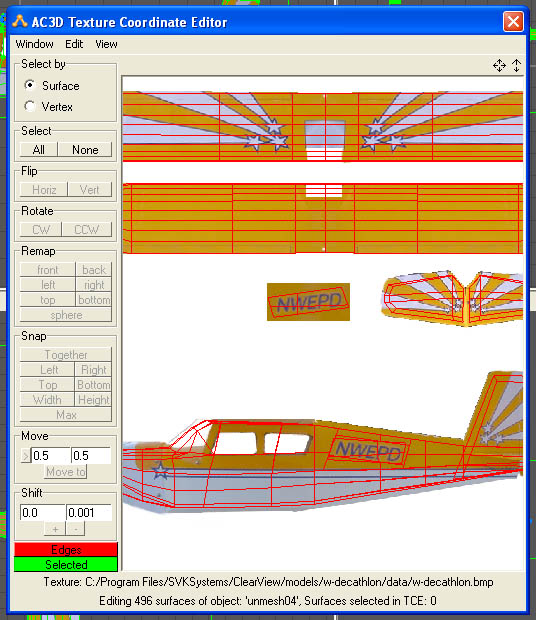
Now open the Texture Editor (F10 or Tools->Texture Coordinate Editor) and you will see that the surfaces are apparently mapped correctly but closer examination of the picture will show that although this is the left hand side of the aircraft it is in fact mapped to the right hand side registration letters.

To correct this, the surfaces must be moved to the lower text.
Now the surfaces need to be adjusted to fit. If you take a look at the front window you will also see that the text is still reversed. Both problems can be most easily fixed by flipping the surfaces horizontally.
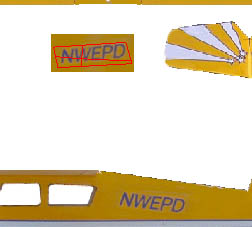
In the texture editor select all surfaces and then select 'Flip Horizontal' It is then just a simple matter of fine tuning the position until it encloses all the text and the appearance in the front window matches the desired look.
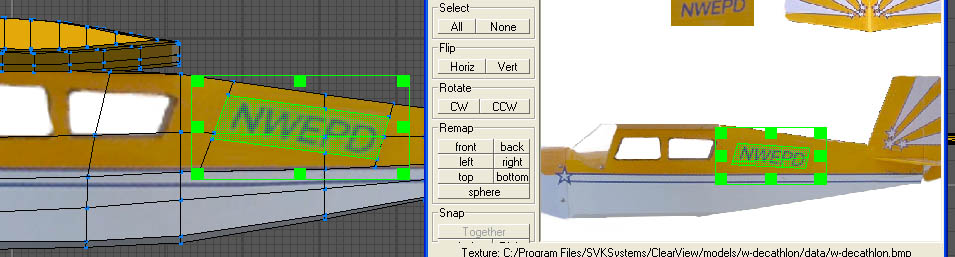
Close the texture editor window and then repeat for the right hand side of the aircraft. A tip here is to change the front window into a back window by selecting it from the Camera menu.
It is a good idea to save the model again at this point. You can load this model in ClearView and it will be displayed correctly. However, there is still work to be done. It is likely that ClearView will still be repeatedly crashing the model or displaying it in funny positions. This is because the model is missing some important reference points which we will add next.